How I set up Ubuntu inside VirtualBox — and what each step actually does.
A walk-through of installing Ubuntu 22.04 LTS in a virtual machine, with the why behind every step. The clicks are easy. The reasoning behind them is the part worth keeping.
There is something a little ceremonial about installing a new operating system. The progress bars, the choice of language and time zone, the pause where the installer formats the disk and you wonder if you remembered to back things up. For most people, this is the boring infrastructure that happens before the real work. For a Cyber Security Analyst student, this is the work.
This is the second lab in a series I’m working through. The first walked me through Rocky Linux. This one does the same exercise with Ubuntu. Same outcome, completely different conventions, and that contrast is the point.
I want to use this post to do two things at once: document what I did so that the screenshots make sense to anyone reading later, and explain what each command actually means so that a future version of me (or a future student trying to find their footing) can use it as a reference rather than a script.
A host machine with at least 8 GB of RAM, 70 GB of free disk space, and a CPU with hardware virtualization enabled (Intel VT-x or AMD-V). I am running this on Windows 11 Pro with Oracle VM VirtualBox as the hypervisor.
Why Ubuntu, and why a VM
Ubuntu is one of the most widely deployed Linux distributions in the world. If you walk into a cloud provider’s dashboard — AWS, Azure, DigitalOcean — Ubuntu is almost always the default. It is also the distribution most developers use on their laptops, which means a security analyst will spend a lot of their career working with Ubuntu hosts whether they chose them or not.
The version we install in this lab is 22.04 LTS, codenamed Jammy Jellyfish. The “LTS” stands for Long-Term Support, meaning Canonical (the company behind Ubuntu) will publish security patches and bug fixes for it for five years. In a production environment that’s the version you want — stability over novelty.
Doing this inside VirtualBox rather than on bare metal matters for one specific reason: snapshots. A snapshot is a point-in-time copy of the entire VM that you can roll back to with two clicks. When you are about to test a misconfiguration, run a script you don’t fully trust, or — eventually — analyze a piece of malware, the ability to revert is not a luxury. It is the difference between a clean lab exercise and a permanently compromised machine.
Get the installer
Head to ubuntu.com/download/desktop and grab the Ubuntu Desktop 22.04 LTS ISO file. It is around 4.7 GB so plan for a few minutes of downloading.
An ISO file is a single-file copy of an entire optical disc. Decades after CDs and DVDs stopped being how we install software, the format stuck around because it works perfectly for “here is a bootable image of an installer,” which is exactly what we need. VirtualBox will mount this file as a virtual DVD drive when the VM starts.

Build the box
Inside VirtualBox Manager I created a new VM with these specs:
- Name: Ubuntu 22.04 LTS — CYB222
- Type / Version: Linux / Ubuntu (64-bit)
- Memory: 4096 MB (4 GB)
- Processors: 2 vCPUs
- Virtual disk: 30 GB, dynamically allocated VDI
- Network: NAT
The hardware here is generous but not extravagant. Dynamically allocated means the virtual disk file only grows on the host as the guest actually fills it — a clean Ubuntu install will use perhaps 7-8 GB even though the VM thinks it has 30. NAT networking means the VM uses the host’s network connection but is not directly reachable from outside; it is the safe default for lab work.
Hand off to the installer
With the ISO mounted, the VM boots into the Ubuntu installer. The questions it asks are mostly mechanical — language, keyboard layout, time zone, what to do with the disk — and the answers don’t matter much in a lab environment. The one decision that does matter, and that is worth understanding, is the user account.
Ubuntu’s installer asks you to create one user account. That account, by default, is automatically added to the sudo group. There is no separate root password. This is not a bug or an oversight — it is a deliberate security design.
Ubuntu’s design avoids ever logging in as root. Instead, an authorized user temporarily borrows root’s powers, one command at a time, by prefixing it with sudo. The audit trail records who escalated, when, and what they ran. Every elevation has a name and a reason attached to it.
Compare this to systems where everyone shares the root password and logs in as root for routine work — there is no way to know which administrator broke something at 2 a.m. The sudo model is the default not because it is easier, but because it is more accountable.
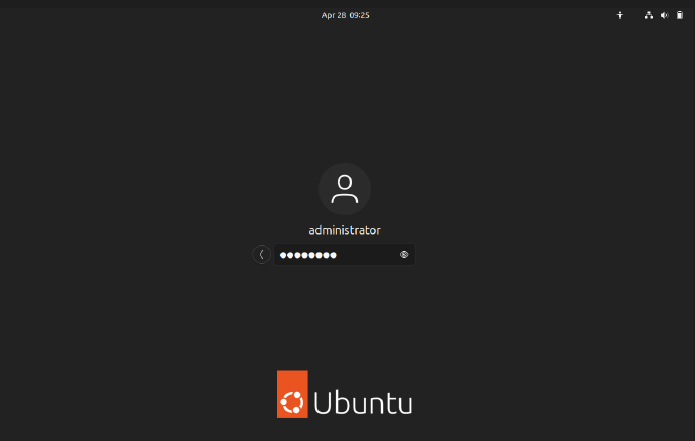
After installation completes, the VM reboots into Ubuntu’s GNOME login screen. The orange Ubuntu logo at the bottom is unmistakable.
Refresh the package index
Most users will never leave the graphical login. We are not most users. The lab asks us to switch to a virtual terminal — tty3 — by pressing Ctrl + Alt + F3 (or in VirtualBox specifically, Right Ctrl + F3, because VirtualBox intercepts the host key combinations). What appears is a black screen with a login prompt and nothing else. No GUI. No mouse. Just a place where commands happen.
Linux runs several of these virtual terminals at once, all the time, in the background. The graphical desktop is itself just one of them. This is one of the small philosophical tells of Unix — the text interface is not a fallback for when the GUI fails. The text interface is the system. Everything else is a wrapper.
Once logged in, the first real command of the lab:
sudo apt updateThis does not install or upgrade anything. It contacts the configured Ubuntu package mirrors and refreshes the local index of which packages exist and which versions are currently available. Think of it as the difference between updating your Yellow Pages versus calling a plumber. You need an accurate index before you can do anything useful with it.
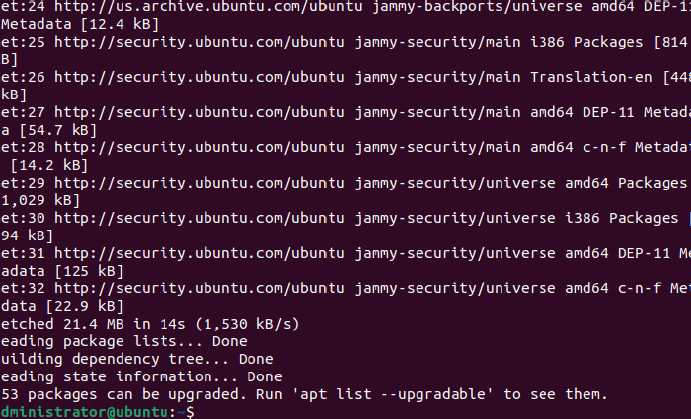
sudo apt update finishing — 21.4 MB fetched, 253 packages now available to upgrade.The output ends with the line: “253 packages can be upgraded.” That is not a defect — it is normal. The ISO image was built months ago, and in those months Canonical has shipped 253 package updates. Many of those will be security patches.
Apply every patch
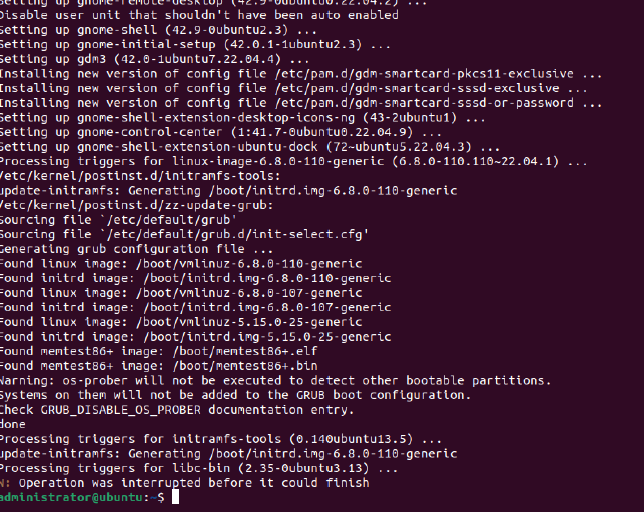
sudo apt dist-upgradeThis is the command that actually downloads and installs the new versions. The “dist” in dist-upgrade means it will intelligently handle changing dependencies — if a new version of one package now requires a different version of another, it will resolve that automatically, including adding or removing packages where needed. The plain apt upgrade command is more conservative; dist-upgrade is the right choice when you want to be fully current.
What scrolls up the screen for the next ten or fifteen minutes is dense and rewarding to watch. Kernel images are unpacked. GRUB (the bootloader) reconfigures itself. initramfs images are regenerated. GNOME components are updated. Each line is a piece of the operating system being patched against a vulnerability or fixed against a bug.
The vast majority of opportunistic attacks on Linux servers do not exploit unknown, sophisticated vulnerabilities. They exploit known, public, already-patched ones. The breach happens because no one ran the equivalent of these two commands. Patch management is not glamorous and it does not make a good headline, but it is what separates a hardened system from an easy target.
Save a clean baseline
Once the upgrade finishes, a clean shutdown:
sudo poweroffNote the sudo prefix. On a Rocky Linux system you might run poweroff as root directly. On Ubuntu, with no root login, every privileged action is escalated through sudo. Different distros, same outcome, different conventions.
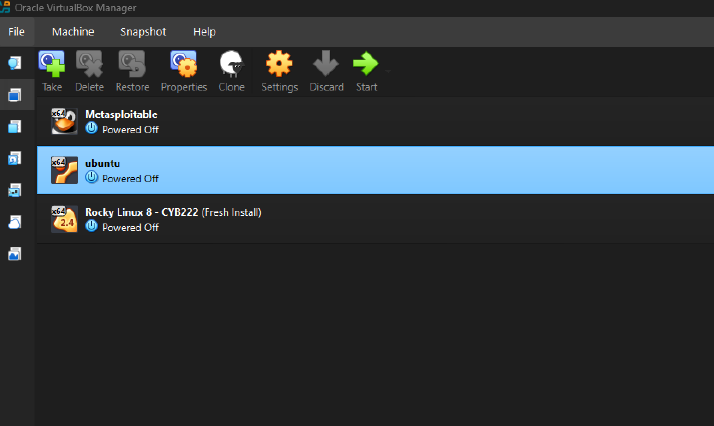
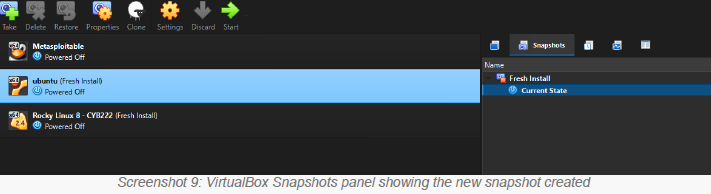
With the VM cleanly off, I take a snapshot in VirtualBox Manager and call it Fresh Install. This is the baseline I will return to whenever a future lab leaves the VM in a state I don’t want to keep. It is also, more philosophically, the moment in this lab where I think the cyber security thinking really starts: the assumption that something will go wrong, and the discipline of preparing for it before it does.
Two distros, same goal, different dialects
The thing this lab really teaches — and the reason it’s worth doing twice with different distributions — is that “Linux” is not one thing. The two big families of Linux distributions have completely different conventions for the most common administrative tasks. A working knowledge of both is the basic table-stakes for any sysadmin or security analyst.
dnf / rpmapt / dpkgsudo groupsudo dnf updatesudo apt update && sudo apt dist-upgradeUnderneath, both are Linux. Both run the same kernel, the same shells, the same languages, the same servers. But every distribution has its own opinionated answer to how software gets packaged, how administrators escalate privileges, and how the system boots. A skilled analyst learns the patterns underneath the differences.
What stuck with me
This lab is short. The total active work is maybe forty-five minutes once the downloads finish. But three things from it I want to actually keep:
- The package manager is the most important command on the system. Everything else — installing a tool, patching a vulnerability, removing a service — flows through it. Knowing both
aptanddnffluently is not optional. - The default user model is a security control. Ubuntu’s choice to disable root login by default is not a UI decision. It is a deliberate trade-off that makes the system slightly less convenient and meaningfully more accountable.
- Snapshots are a habit, not a feature. The VirtualBox button is just a button. The discipline of taking a snapshot before doing something risky is what actually protects you. That habit transfers — to production server backups, to git branches before a refactor, to anything where the cost of “I broke it” is more than zero.
Read next
This piece is part of an ongoing series of notes from my journey through tech and cyber security. If you enjoyed it, you might also like: